Standard Helmets (February 14, 2014)

Finally ordered two higher viz helmets to complement the vests, HJC on the left, 3 AFX on the right.  The orange and yellow are the new additions via Amazon though I’ve since found Ebay or others for the same price.  Fits are finr though they tend to be a little noisy at speed.

helmets-standard

Handlebar Lock (December 14, 2013)

Also found out the other day that the bike  does indeed have a handlebar lock.  Not that it is obvious mind you, but it is there.  Unlike the Kawasaki which locks the handlebars via the ignition the Honda is a manual lock on the forks below the instrument cluster.  In order to lock it one must first take the key out of the ignition and then manually lock the handlebars after turning them almost full left.

It does help, of course, to remember to unlock the handlebars prior to starting the bike up and trying to ride it somewhere …

Nighthawk Mileage (December 14, 2013)

So I’ve ridden to work for 2 weeks, and made 2 site visits that required some highway driving.  1st full tank of gas I only manage 51mpg.  2nd tank of gas I managed 60.1 mpg but was able to ride on the Frontage Road that parallels the interstate for most of the trip where the speed is 75 mph.  (the 250 doesn’t really care for going 75 mph, at least I don’t think it does).)  So I’m still looking at 3x my truck mileagea nd almost 1.5x my non-roadworthy kz550.

The Ring Vent (October 6, 2013)

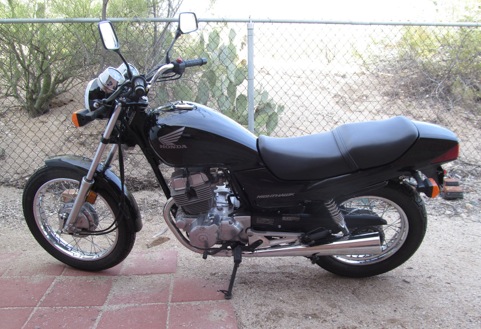
After putting eveything back together several times, most recently with the radiator hose air boots, I was able to ride the bike, sync the carbs to proper inches of vacuum (10) and feel pretty good.  Until I’m standing there listening to my happy idle and I hear a slight pop and a continuous hiss.  Putting my head too close to the engine I can’t find out where the sound is coming from and I burn my nose.  Looking at my carb sync gauges I note that my vacuum pressure has dropped from 10 down to 5 – on all the gauges.  Great.  Another major vacuum leak.  Frustrated, and hot since it is over 95 d f outside, I called it a day and put everything away.

The next morning (October 5 for those of you following and counting days like sheep), I pull the bike back out and try to figure out where the vacuum leak is.  Start up the bike, let it idle for a few minutes to get stable, and start spraying around the carb boots and intakes with WD40.  What do I find?  Nothing.  Absolutely nothing.  No engine surge or change in RPM.  Just WD40 dripping off my now hot engine …

Then I remembered something I saw on the web about a guy having a problem when riding and when he opened the gas tank he heard a WHOOSHing sound.  Hm…. My gas cap has made that sound plenty of times … So I get my gauges back out and hook one up.  Restart the bike, 5 inches of vacuum.  Open the gas tank cap while bike is running and BAM BAM Pebbles.  The gauge climbs to 10 inches of vacuum.  Stupid gas tank cap.  Looks like the gasket seal is bad.   These are $10 (cheapest) on ebay.

So I take the gasket out, visit Autozone, they have nothing.  Walk across the street and visit O’Reilly Auto, and they have gasket material.  So for $10 I get a bunch of different type of gasket material and I make my own gasket.  It is now installed.  Test start later today or tomorrow to see what happens.

Carburetor Hosed Boots (October 3, 2013)

So in order to avoid being known as “Bleeding Knuckles O’Leary” for my carburetor airbox work I figured replacing those 30 year old air boots would be a good idea.  Now a set of 4 of those things runs about $40 on ebay, or more, and there’s no guarantee used ones won’t be just as hard as the ones I already have.  New ones tend to be a bit more expensive but could be servicible if they haven’t been sitting on a shelf for a long time.  I generally prefer to avoid NOS (new old stock) items that have been sitting on a shelf due to previous experience with rubber products that look good but have structurally deteriorated due to non-use.

So what to do?  Google.  Found a video on youtube where a mechanic used a radiator hose, cut to fit of course, to connect his single carburetor to his air box.  Autozone carries a radiator hose of the appropriate diameter and long enough to cut into 4 pieces for $10.  Just remove the inner support coil, measure twice, cut once, and then fight the install.

What did I just learn?  The airboots on my bike aren’t actually the same size.  They look like it in the pictures but the two outside ones are 47 mm diamter and the inside two are 39 mm in diamter.  Stupid engineer who designed this ….

20131003_radiatorhoseboot_5749

20131003_radiatorhoseboot_5750

Air Bending Boots (September 28, 2013)

One of the problems with working with 30 year old bikes is working with 30 year old rubbers.  Note that said 30 year old rubbers tend to harden, and shrink, so they no longer fit right and are a pain in the nether parts to remove and reinstall.  One method of softening the hard rubber air boots that join the carburetors to the air box is to blow hot air on them with a hair dryer.  This will soften them, i.e. make them flexible, so they are easier to install.  Unfortunatley they only retain the flexibily while they are warm.  As they cool down while you are trying to install them they will stiffen up and be next to impossible to install without using the hair dryer outside and holding it with the 3rd arm and hand you had to grow through evolution just for this purpose.

20130928_airboots_5578

The Duke of Hazard Flasher (September 27, 2013)

Note to Self:  Be careful when working around carbs with the seat open.  If you close the seat make sure nothing that can be damaged is hanging around the seat supports or frame, especially when you are closing the seat to lean on it for leverage.  Fortunatley this is only my hazard flasher and not the regular blinker (turn signal) flashing unit.

20130927_hazardflasher_5564

Carb Flap Fix (September 25, 2013)

Waited over night for the JB weld to dry.  The flaps came out good & except for #3 installed well.  Note to Self:  Do not cover thin silver flexible strip and ballbearing on back with JB weld.  This needs to flex as the flap slides down and into the carb body.  Had to cut out the extra JB weld so it would operate properly.

20130925_flapsfixed